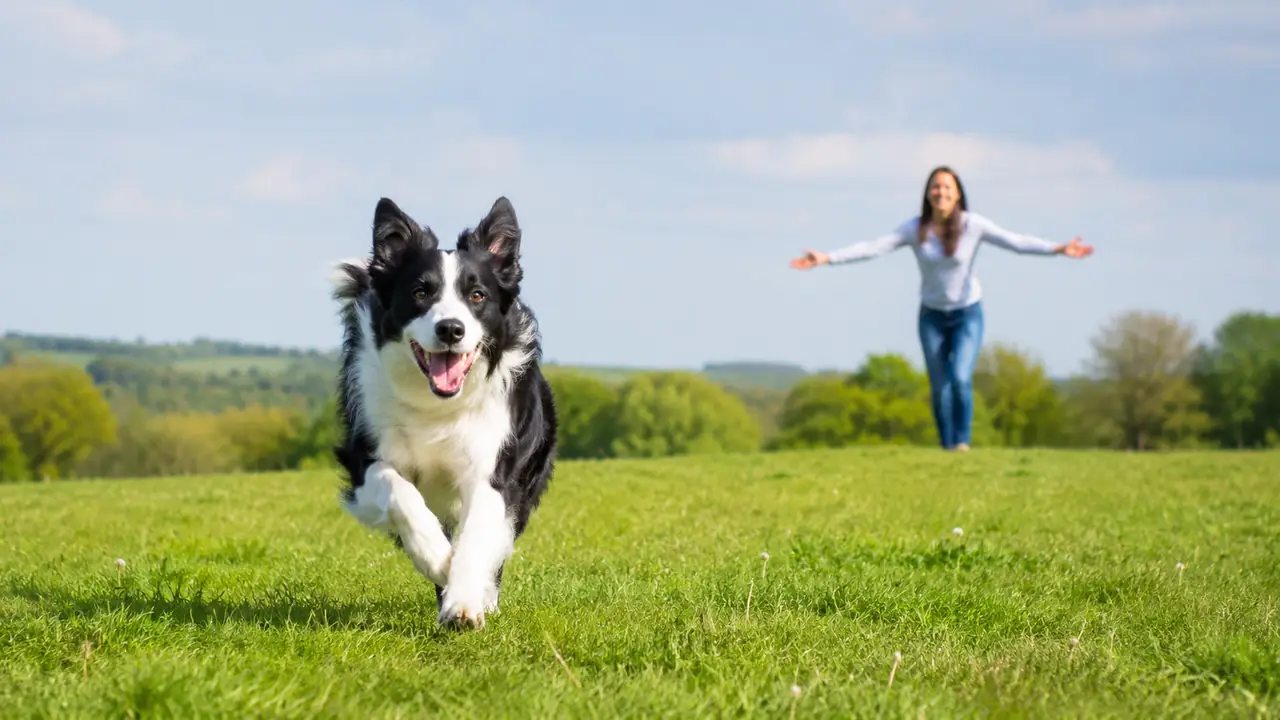
Agility Training for Dogs: A Beginner Guide to Safe Agility Work
Agility looks like a fast obstacle course, but the safest beginner training starts long before a dog is asked to jump at full height or weave at speed. The foundation is body awareness, handler communication, confidence around equipment, safe surfaces, gradual conditioning, and a dog who can disengage and rest rather than becoming frantic around movement.
For a healthy adult dog, agility can combine physical exercise with intense mental work and teamwork. For a growing puppy, senior dog, overweight dog, or dog with orthopedic history, the same activity needs modification. The aim is not to reproduce competition obstacles immediately; it is to build the skills and fitness that make later obstacles safer.
Start With a Veterinary and Fitness Reality Check
A dog with lameness, recent injury, obesity, heart or respiratory disease, or known orthopedic problems should be evaluated before high-impact agility work. Even apparently healthy dogs benefit from gradual conditioning because agility asks for acceleration, deceleration, turning, jumping, balance, and repetitive loading that ordinary walks do not.
Agility can look like a series of playful jumps and tunnels, but the sport demands acceleration, braking, balance and sharp turns. Before beginning, consider your dog's age, body condition, endurance and injury history. A dog that limps after walks, becomes breathless in mild exercise or has known joint disease should be assessed by a veterinarian before participating in high-impact work. Even a healthy adult needs conditioning appropriate to its current fitness. Being enthusiastic about chasing a toy does not automatically mean a dog is ready for repeated jumping.
Start with a calm movement assessment: can the dog walk and trot on level ground comfortably, turn both directions and recover normally after a moderate activity? Note any stiffness after rest or reluctance to use stairs. A veterinarian or qualified canine rehabilitation professional can help distinguish training issues from physical limitations. For short-nosed dogs, dogs with heart or respiratory conditions, and dogs in hot climates, exercise tolerance and temperature management deserve special attention. A shortened or modified obstacle program may be more appropriate than competition-style work.
Keep a basic training log that includes duration, surface, obstacles used and how the dog behaved afterward. If performance deteriorates, do not assume the dog needs more repetition. Pain, fatigue and apprehension are reasons to reassess the plan. Good agility training starts with a dog that is physically capable and happy to participate, not an obstacle course that has to be completed at any cost.
Puppies Need Foundations, Not Full-Height Jumps
Growing puppies can learn targeting, tunnels, flatwork, handling cues, low balance exercises, and confidence around equipment without repetitive impact. Full-height jumping, hard weave entries, and demanding contact work should wait until physical maturity appropriate to the dog and guidance from an experienced instructor or veterinarian.
Young dogs can learn a surprising amount about agility without repeatedly jumping, weaving or making hard turns at speed. Practise following a hand target, stepping onto a stable flat mat, waiting briefly, running toward a handler and exploring gentle changes of surface. Build confidence with simple games that do not demand high impact. Puppies develop at different rates depending on size, breed and individual health; a large dog may need a substantially different timeline from a small adult-looking dog. Ask your veterinarian and a qualified instructor before adding height or more strenuous work.
A useful beginner exercise is walking between two low markers or circling a wide cone at a comfortable pace. Reward attention, smooth movement and willingness to return. A short open tunnel can sometimes be introduced as an exploration activity when the puppy can see through it and leave freely; it should be stable and never used to trap an uncertain dog. Avoid asking for repetitive tight weaving or rapid jumping simply because the puppy seems willing. Young dogs will often enthusiastically repeat movements that place unnecessary load on developing structures.
Keep sessions brief and playful. The best foundation is a puppy that enjoys new equipment, understands familiar cues and can settle afterward. A dog who trusts the handler and knows how to respond to markers and rewards will learn future obstacle skills more easily than one who has been rushed into adult exercises. Growth and comfort set the pace, not social-media demonstrations.
Teach Engagement and a Release Cue
A dog should be able to orient to the handler, follow a hand or target, wait briefly, and release on cue. These simple behaviors make obstacle training clearer and reduce the temptation to physically place the dog on equipment.
Before asking a dog to negotiate equipment, teach it to notice and respond to the person guiding it. Begin in a safe enclosed area, reward spontaneous check-ins and practise following a hand target at a walking pace. Add a simple start-line pause only when the dog understands it; the pause should be brief, comfortable and clearly followed by a release word. A predictable release makes it easier to distinguish “wait here” from “move with me” without shouting or physically blocking the dog's path.
Engagement is not the same as constant eye contact. An agility dog needs to watch obstacles, read your movement and maintain awareness of the course. Practise a few steps together, then reward the dog for turning with you. Change direction gradually and deliver rewards where you want the dog to travel. For example, if you want the dog to turn left after passing a cone, toss a reward a short distance toward the left exit rather than attracting the dog back across its path. Good reward placement can teach a trajectory without forcing the dog's body.
Keep the release cue consistent across family members and sessions. If the dog breaks its start-line wait, calmly reset to an easier duration instead of increasing pressure. Never rely on an obedience wait to keep a dog out of danger; gates, secure leads and controlled environments still matter. Engagement should produce a confident partner who is eager to work, not a dog worried about making mistakes.
Flatwork Comes Before Obstacles
Practice circles, front crosses, rear crosses, sending around cones, recalls, direction changes, and running together on the ground. Flatwork teaches the dog how handler motion predicts the next line and prevents equipment from becoming the only thing the dog understands.
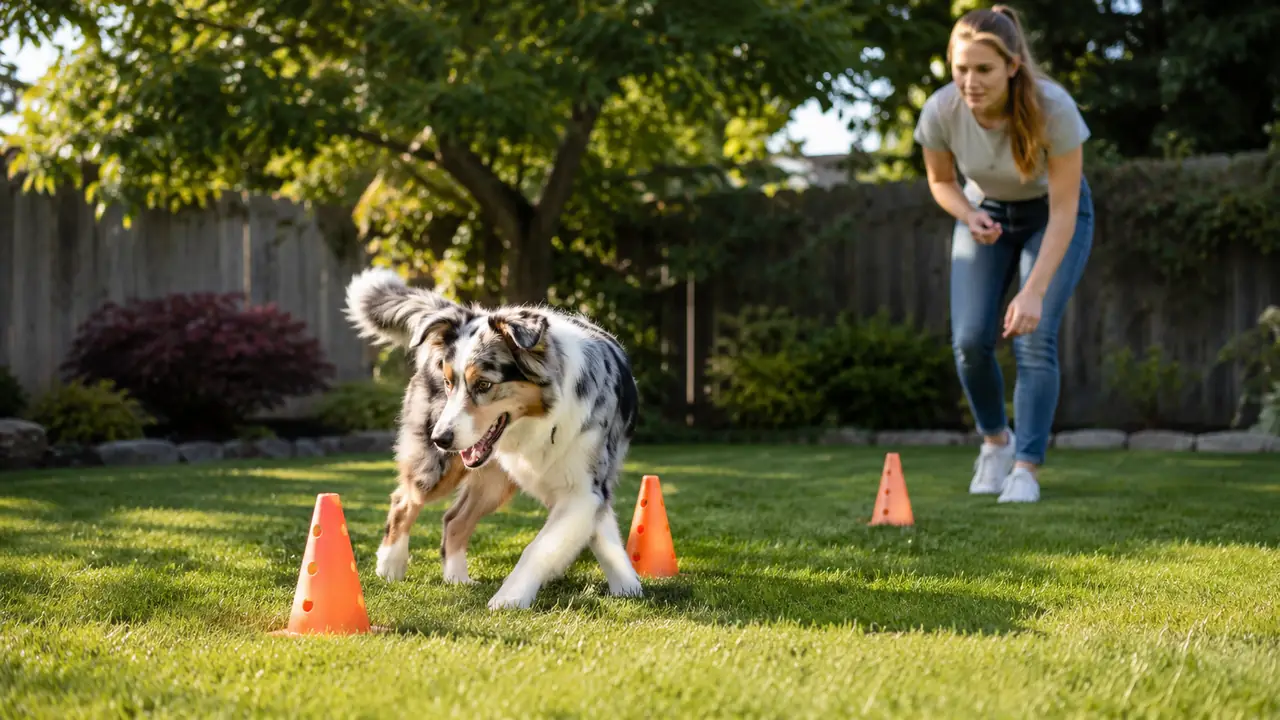
Flatwork is the movement language between the dog and handler. Practise easy circles around cones, changing your running direction, sending the dog a short distance forward, recalling it toward your side and rewarding a turn away from you. You can do all of this on safe, level ground without jumps. The dog learns to interpret where your shoulders, feet and reward delivery suggest it should go. The handler simultaneously learns to give one clear message instead of waving both hands and calling repeatedly.
Start at a pace where neither of you trips over the other. Place two cones several strides apart, guide the dog around one and reward on the line of travel toward the next. Then reverse the pattern to work the other side. Keep turns broad for beginners, particularly dogs with large bodies or limited conditioning. Front- and rear-cross handling can be introduced as slow demonstrations before anyone tries them at speed. The goal is accurate communication and controlled movement, not a racing time.
If the dog cuts behind you, freezes or turns the wrong way, simplify the path and think about your timing. Were you moving too late? Did the reward appear in the wrong place? Were you asking for a sharper turn than the dog could comfortably manage? Record a short clip from a safe distance if it helps you see the mechanics. A few good flatwork repetitions can solve problems that would otherwise become stressful obstacle drills.
Tunnels Are Often a Confidence-Friendly First Obstacle
Begin with a short, straight, stabilized tunnel so the exit is visible. Reward movement through without pushing or trapping the dog inside. Curves and longer tunnels come later after the dog is confidently choosing the obstacle.
A short, straight tunnel with a visible exit can be inviting for some dogs, but others find the material, noise or enclosed feeling worrying. Secure the tunnel so it cannot roll, check the footing and invite exploration without pushing from behind. Initially reward a glance or step toward the entrance. If the dog walks through, meet it at the exit and celebrate. Allow it to leave freely if uncertain. Do not crawl into a tunnel to drag the dog through or have helpers block the entrance to prevent escape.
Once a dog confidently moves through a short tunnel, add a simple cue and gradually increase length or change the angle with guidance from an instructor. Avoid immediately placing a sharp turn after the exit; the dog needs room to orient and decelerate. Keep the tunnel dry and in good condition. Damaged or collapsing material and slippery interiors are not training challenges to be overcome. A frightened dog can associate the equipment with being trapped, making later attempts much harder.
Use the tunnel as one part of a varied, short session. Alternate a successful pass with easy flatwork or a sniff break, and watch enthusiasm rather than counting how many times the dog will go through. A dog that hesitates after previously enjoying the obstacle might be sore, tired or stressed. Pause, check the setup and consider veterinary advice if a movement change persists. Confidence is the outcome, not merely reaching the far end.
Jump Training Is About Technique, Not Height
Start with poles on the ground or very low. Teach the dog to approach straight, maintain balance, and land under control. Height should rise gradually and according to the dog’s size, age, fitness, and competition rules if relevant.
A low bar does not automatically create a safe jump, and a high bar does not demonstrate a better-trained dog. Jumping requires timing of take-off and landing, balance, strength and an ability to see the next line of travel. Begin with poles on the ground or very low settings selected by a qualified instructor for the dog's age and fitness. Reward the dog for moving smoothly and comfortably over the line. The handler should learn to approach at a safe angle and direct the dog toward an uncomplicated landing area.
Watch for repeated knocking of bars, awkward landings, shortened stride or hesitation before taking off. Those signs may reflect unclear handling, fatigue, fear or discomfort. Lower the demands rather than drilling the same obstacle. Never set heights based solely on a dog's apparent enthusiasm or compare a developing youngster with fully conditioned competition dogs. If the dog has lameness or a known orthopedic condition, seek veterinary guidance about whether jumping is appropriate at all.
Focus on a relaxed approach and consistent reinforcement. Reward in the direction the dog should travel, and alternate a few short jumping exercises with flatwork. Keep repetition counts modest until conditioning improves. A thoughtful course is built around safe movement and clear information, not pressure to clear a bar at every attempt. Height should be among the last variables you increase.
Weave Poles Require Gradual Training
Weaving asks for repeated lateral spinal and limb movement. Beginner methods such as channel or guide training allow the dog to learn the path before demanding tight, fast weaving. Avoid drilling large numbers of repetitions in a tired dog.
Weave poles can look effortless when performed by an experienced dog, but the movement requires repeated bending, weight transfer and rapid foot placement. Beginners need more than the instruction to follow a treat between tightly spaced poles. Many instructors use widely spaced channel poles, gradual shaping or other methods that let the dog learn the entry and direction without immediately forcing full-speed weaving. Ask an instructor which approach is suitable for your dog's structure and conditioning.
Start slowly and reward entering the correct path. Work in both comfortable orientations, but do not drill many repetitions until the dog is tired. Watch whether it accelerates confidently or begins to hesitate, skip poles or twist awkwardly. Those changes may signal confusion or physical fatigue. Avoid pulling on the collar to move the dog into the correct line. A dog needs to choose and learn its path, and forced positioning is a poor substitute for gradual skill-building.
If you notice soreness after weave work, stop and seek veterinary advice rather than trying to condition through the problem. Puppies and unconditioned dogs should focus on foundations before full weaving. A safe training plan includes plenty of rest, correct footing and an instructor who is willing to reduce difficulty when technique deteriorates. Accuracy and confidence precede speed.
Contact Equipment Needs Confidence and End Behavior
A-frame, dog walk, and teeter introduce height, narrow surfaces, and moving equipment. Teach slow confidence, clear foot placement, and a consistent contact-zone behavior rather than chasing speed first. A dog who is worried by height should never be dragged or lured across faster than they can cope.
The A-frame, dog walk and teeter require the dog to manage a height change, a narrower surface and sometimes moving equipment. Start with low, stable foundation exercises such as stepping onto a broad non-slip platform and targeting a clear, reachable position. Reward voluntary contact with the surface and let the dog step off when needed. High equipment should be introduced with a qualified instructor using correctly installed safety-rated apparatus, not improvised boards across furniture or slippery tables at home.
Contact-zone training adds another layer: the dog must know what to do at the obstacle's exit. Some programs teach a stop with front paws on the ground and rear paws on the board; others use a running contact, depending on the sport, dog and instructor. Whatever approach you choose, make the cue consistent. Practise the end behavior at low height and reward where the dog should finish. Do not physically shove or hold the dog in place at the edge. Confidence in the equipment and clarity about the finish need to develop together.
The teeter is a special case because its movement and noise can startle a dog. Introduce motion in tiny, controlled increments with the instructor securing the board. Watch body language and stop before panic. A confident dog should be willing to return for another repetition, not merely complete one under pressure. Good contact work is careful construction of both mechanical skill and emotional safety.
Warm Up Before Fast Work
Begin with several minutes of easy walking and trotting, gentle direction changes, and a few controlled movement exercises before sprinting or jumping. Save static stretching for after the dog is warm or use veterinarian/rehab-guided mobility work rather than pulling cold limbs into long stretches.
A warm-up prepares the dog for movement and gives the handler a chance to notice subtle changes in gait. Begin with several minutes of easy walking or trotting, then gentle wide turns, comfortable hand targets and a few low-intensity movement patterns already familiar to the dog. Do not start a session with the most demanding jump or weave sequence simply because the dog is bursting with energy. A warm-up is not a trick performed for a checklist; it is a gradual transition from rest to harder work.
Adapt to weather, ground and the dog's condition. In hot or humid environments, even the warm-up may need shortening and exercise may be inappropriate at peak heat. Provide water, shade and opportunities to stop. On cold days, avoid asking a stiff dog to accelerate immediately. If your dog limps, coughs, becomes unusually breathless or looks reluctant to move, cancel the intense work and seek veterinary guidance if signs persist. No training goal is important enough to justify pushing through suspected injury.
After the session, allow a few minutes of easy walking and an unhurried rest. Note whether the dog moves comfortably later that day and the next morning. Recovery information helps you judge whether the intensity was appropriate. A thoughtful warm-up and cooldown can also improve the quality of training because the dog arrives at obstacles more settled and the handler more attentive.
Surface and Footing Matter
Avoid slick floors, deep unstable sand, hard concrete, hidden holes, and wet grass when asking for speed and turning. Good traction and a level surface reduce preventable slips and make the dog more confident.
Agility asks for repeated braking, turning and landing, so traction matters as much as enthusiasm. Walk the training space before every session. Look for holes, slippery patches, loose equipment, sharp objects and transitions between surfaces that could surprise the dog. Avoid slick tile, icy ground, wet boards, deep loose sand and hard concrete when practising fast turns or impact work. On grass, note whether dew or irrigation has changed traction since the previous session. Indoor matting should lie flat and be designed for canine movement.
Footing also affects how a dog gains confidence. A cautious dog may slow down on an unfamiliar surface for good reasons. Let it investigate and walk calmly before adding speed. Adjust the equipment rather than rewarding the dog for risking a fall. Check toenails and paw pads routinely; overlong nails, painful pads or unsuitable footwear can affect comfort and grip. A dog that repeatedly slips should stop that task, not be asked to “get used to it.”
Equipment should remain stable when the dog moves across it, and landing areas need sufficient space to decelerate. Busy public parks are rarely appropriate places to install makeshift agility obstacles where people or other animals may run through the course. Use a controlled setting and a knowledgeable instructor. Safety depends on the whole path of movement, not only on the obstacle being clear.
Stop Before Fatigue Changes Movement
A tired dog knocks bars, turns late, slips, jumps flat, or loses focus. Those are not reasons to drill harder; they are reasons to stop. Quality repetitions build skill, while fatigued repetitions build compensation and increase injury risk.
An excited dog may continue running after coordination starts to decline. Learn the early signs: a normally smooth dog suddenly knocks low bars, clips the tunnel edge, turns later than usual, changes stride, hesitates at contacts or stops offering familiar check-ins. A slower tail or panting can be normal in exercise, but increasing awkwardness or distress is not a cue to push harder. End the difficult work before these patterns become pronounced. Physical fatigue and loss of concentration both increase the chance of mistakes.
Plan fewer clean repetitions rather than unlimited attempts to “get it right.” If a dog has performed a sequence well twice, the next useful lesson may be rest. Between runs, offer water and a quiet shaded area. Adjust the next session based on how the dog behaved after the previous one. Sudden lameness, collapse, overheating or significant breathing difficulty requires urgent veterinary attention. Never use exercise as punishment or withhold water to keep a dog eager for rewards.
Handlers fatigue too. When your timing becomes late or you start turning into the dog's path, the dog may struggle despite knowing the course. Build a realistic ending ritual: one easy flatwork success, a reward and a calm cooldown. Stopping while both dog and handler are still performing comfortably creates better memories and more reliable learning than chasing one final fast run.
A Beginner Class Can Prevent Months of Bad Habits
A qualified instructor can set equipment safely, choose appropriate jump height, observe movement, and teach handler mechanics that are difficult to learn from videos alone. Group class also adds controlled distraction once foundation skills are ready.
A qualified beginner class provides more than equipment. It teaches the handler where to stand, when to cue a turn, how to reward along the travel line and how to recognize unsafe movement. Ask whether the instructor adjusts challenges for age, size, breed, fitness and confidence. Beginners should see low-impact flatwork, gradual obstacle introductions, proper warm-ups and a plan for rest. A class that pressures every dog to take a full-height jump on the first day is not a good fit for a cautious or unconditioned animal.
Visit or observe a session if possible. Do dogs have enough space to work without running into each other? Are people using reward-based methods instead of leash corrections, threats or physical force? Is equipment in good repair with adequate landing space? Does the instructor allow a dog to take a break or skip an obstacle? Ask about emergency plans, first-aid readiness and whether the course requires a veterinary clearance for a dog with a known condition. These details matter more than trophies displayed on the wall.
Good instruction also helps you decide whether competition is appropriate. Some dogs love slow recreational obstacle games but do not enjoy crowded trial environments. That is a perfectly valid outcome. Training should fit the dog's body and temperament, not force every participant toward the same goal. The right class makes both dog and handler more competent, confident and safe.
Common Mistakes to Avoid
- Starting full-height jumps with a young puppy
- Training on slippery flooring
- Repeating weave poles until the dog is exhausted
- Using equipment that is unstable or homemade without safe dimensions
- Prioritizing speed over confidence
- Skipping warm-up
- Continuing after lameness or obvious movement change
One mistake is starting with obstacles before the dog understands how to follow a handler. Fast tunnel entries and flashy jumps can disguise the absence of a clear recall, release cue and movement pattern. Build flatwork first. Another mistake is increasing height, speed and complexity together. If the dog starts knocking bars or taking awkward lines, reduce demands and rebuild technique at a safer level. Repeating a difficult move until the dog gets exhausted teaches neither confidence nor sound mechanics.
Do not underestimate equipment and footing. An improvised plank can tip, a tunnel can roll, and wet grass can make a controlled turn unsafe. Inspect the surface every session, use correctly maintained equipment and train with qualified supervision. Avoid forcing frightened dogs through tunnels or holding them on moving contact equipment. Emotional confidence develops through choice and manageable successes. Pressure may get one repetition completed while damaging trust in the apparatus.
A final mistake is ignoring fatigue or pain because the dog still wants to play. Sporting dogs may remain enthusiastic even when sore. Watch movement between obstacles and recovery after the session. If lameness, unusual breathing problems or marked hesitation appears, stop and seek veterinary advice. Safe agility is a long-term partnership, not a contest to squeeze the largest number of repetitions into one day.
A Practical Decision Checklist
- Dog is medically appropriate for activity
- Surface has good traction
- Equipment is stable
- Warm-up completed
- Obstacle height matches age and fitness
- Sessions are short
- Dog remains enthusiastic rather than worried
- Training stops if gait changes or pain appears
Before entering an agility class, check that your dog is physically suitable for the planned intensity and ask for veterinary guidance when there is a health concern. Confirm that the instructor uses humane reward-based methods and that equipment is stable, correctly adjusted and appropriate for the dog's age. Inspect the training surface and weather. Prepare water, high-value safe rewards and a plan for breaks. Know which simple flatwork cue you will use when the dog needs to leave an obstacle.
For each session, identify only one or two learning goals. Perhaps the dog will calmly follow your hand around two cones, or voluntarily enter a short open tunnel. Choose an easy version, reward clean repetitions and increase difficulty in only one way. Do not add a sharp turn, greater height and more speed at once. Note whether the dog chooses to return for another turn. If performance deteriorates, stop or go back to the simplest successful exercise.
After training, look at recovery. Is the dog moving freely on the way home and the next morning? Does it seem comfortable when rising after rest? Keep notes about any hesitations, knocked bars or unusual breathing. Share concerns with the instructor and veterinarian. A well-designed plan values sound movement and the dog's willingness as highly as accuracy on a course.
Frequently Asked Questions
Can any dog do agility? Many dogs can enjoy modified agility, but body structure, age, fitness, breathing ability, orthopedic health, and confidence determine what is appropriate. Competition-level impact is not suitable for every dog.
Can all dogs try agility? Many dogs can enjoy age- and health-appropriate versions, but high-impact competition is not suitable for every individual. Veterinary guidance is important for pain, obesity, heart disease, respiratory limitations or prior injuries. Can puppies jump? Puppies can learn low-impact foundations; repeated full-height jumping and fast weaving should wait for appropriate physical development and professional guidance. Do I need to buy equipment? No. Simple cones, flat targets and a stable mat can teach useful foundations without specialized obstacles.
What if my dog is afraid of tunnels? Let it investigate voluntarily, use a short straight opening and reward small steps. Never push or trap it. How many repetitions are enough? Stop while movement remains comfortable and attention is good. Two clean repetitions may be more productive than fifteen tired ones. Should I practise on my lawn? Only if the footing is stable, clear of holes and suitable for the task; slick or uneven surfaces can be risky for speed and turns.
How do I choose an instructor? Look for gradual progression, good equipment care, respectful reward-based methods and a willingness to modify tasks for each dog. A good instructor should explain not just how to complete an obstacle but how to keep the dog safe while learning it.
The Bottom Line
Safe agility is a progression from fitness and communication to obstacles—not the other way around. Build flatwork, confidence, body awareness, and controlled movement first; add height and speed slowly; and stop while the dog is still moving comfortably and enjoying the work.
Agility is most rewarding when it grows from fitness, clear communication and voluntary confidence. Begin with simple flatwork and a veterinary assessment when appropriate. Teach engagement and a release cue, then introduce obstacles at a pace the dog's body and temperament can handle. Never use height or speed as the measure of whether a dog is talented. Clean movement, sound footing and an eager return for another short turn matter more.
Use properly maintained equipment, watch fatigue and adapt every session to weather, age and individual health. Qualified reward-based instruction can prevent injuries and confusion before they become habits. Some dogs will progress to competition, while others will prefer gentle recreational agility. Both can enjoy the activity when safety and welfare remain the priority.
Additional evidence and further reading (these references do not imply veterinary review): AVSAB — Humane Dog Training | AAHA — Canine Life Stage Guidelines